Create Journeys Banners or Interstitials
Learn how to create a new Journey here!
Prerequisites
- Integrate the Branch SDK into your app and configure deep link routing and attribution before implementing Journeys.
- Journeys uses your alternate domain for iOS Universal Links and Android App Links. Make sure you include your
xxxx-alternate.app.linkdomain in your Associated Domains. If you use a custom domain or subdomain for your Branch links, you should instead add entries forapplinks:[mycustomdomainorsubdomain]andXXXX-alternate.app.link. - Add the Branch Web SDK to your site.
1. Select Audience
Start by clicking the blue Create button on the top right of any page on the Branch Dashboard then select Journey or by clicking Create a New Journey when on the Journeys page.
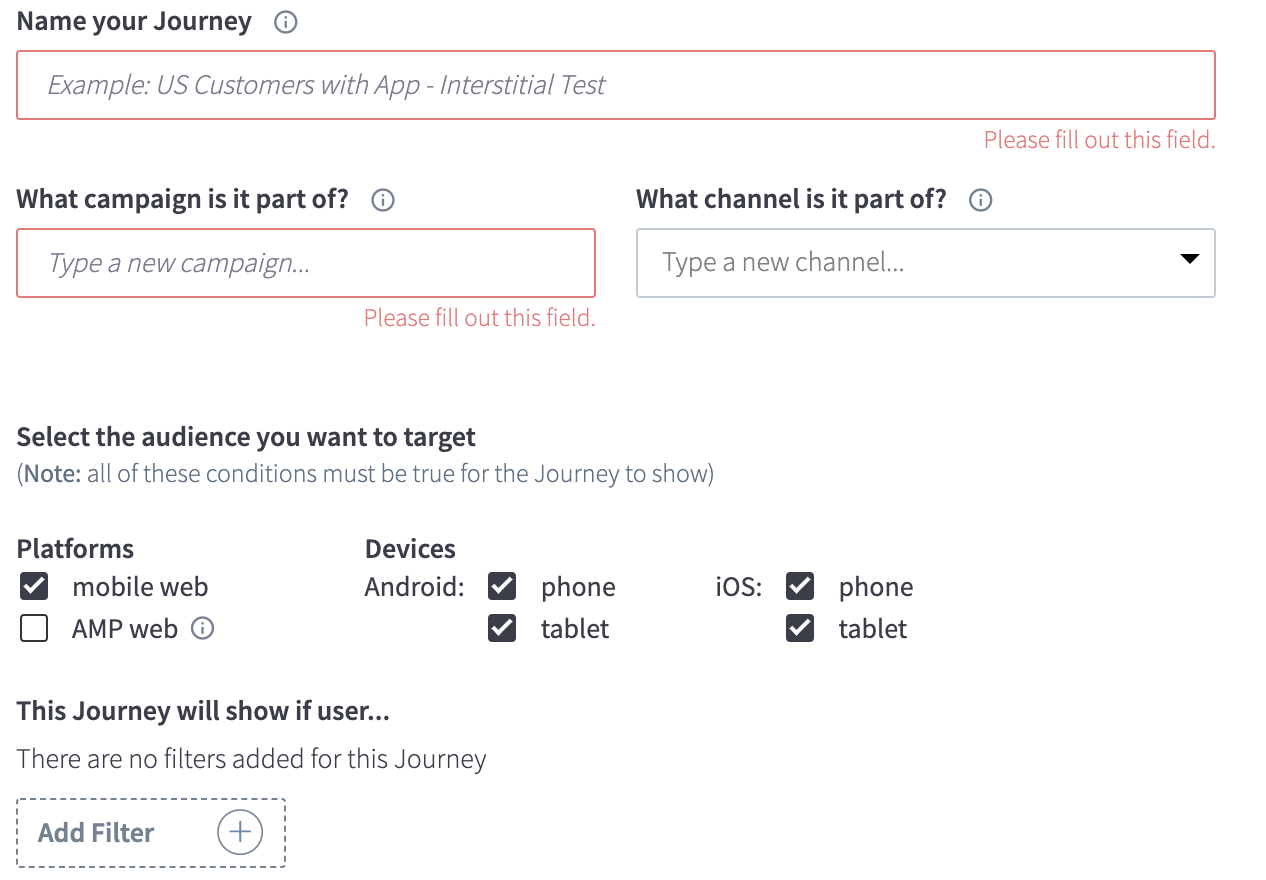
Customize the audience that will see your Journey by completing the following fields:
-
Name Your Journey: This name is how your Journey will appear in the dashboard view (it will never display to your users). Try to stick to a naming convention so that you can easily find Journeys later. For example: Date - Template - OS - Target.
-
What campaign is it part of?: Campaign will automatically populate to match the Name of the Journey.
-
What channel is it part of?: Channel is not commonly used, but will help you analyze your Journey’s later.
-
Select the audience you want to target: Customize the audience that will see your Journey by choosing target platforms and device types. Keep in mind, these conditions are exclusive, meaning all conditions must be true for the Journey to show. Note: Only Branch Standard Banner Bottom is supported on AMP because Google requires that banners cannot show in the top 75% of an AMP page.
-
This Journey will show if user: Using the following options add additional user targeting filters.
Filter Description Has completed event If you have event tracking set up, you can target users based on events that you define. For instance, you might want to show a Journey to users who have completed a purchase within the last week. Is located Use this filter to target (or exclude) users viewing your website in different regions. You can target by country, state/province, or even by city. Is viewing a page url You can define which subsets of your website the Journey will appear in. For example, maybe you have a page yoursite.com/settingsandyoursite.com/products/1234. You could fill in products here so only users visiting a URL with that substring present would see the Journey.Came directly from a url You can target a user based on the last touchpoint before they entered your website. For example, if you want to target users that found you through Google Search, you can select “whose domain matches” and fill in “google.com”. Has visited web Here, you can use website visits to determine who to target. For instance, you might decide that someone who visits your site five times is ready to see a Journey with an incentive to open the app. Has visited the app Similar to visited web, you can target users by the number of app visits. If someone has visited the app twice and opens up the mobile web, they could be encouraged back into the app with a Journey.
Note that this audience filter relies onhas_app, which has limitations as defined here.Has clicked on Email A user is grouped into "Has clicked on Email" when they've clicked a link from Universal Email. You’ll need to consider the way the link is created through a Universal Email integration. You can use this to target users who have been part of an email campaign. One example could be a specific call to action to get them to download the app if they have landed on mobile web and don’t already have it. Has clicked on Ad A user is grouped into "Has clicked on Ad" when they've clicked a link from Deep Linked Feeds. You’ll need to consider the way the link is created through Deep Linked Feeds. You can use this to target users who have been part of an ad campaign to improve your ROI, maybe with a specific call to action to open the app. Has the app installed You can target users based on whether or not they have the app installed. You might choose to only show a Journey that asks users to open the app to those that already have it installed.
Note that this audience filter relies on has_app, which has limitations as defined here.Is viewing a page with metadata key This filter is for targeting users viewing web pages with certain metadata specified. This data can be specified in HTML tags on a webpage, passed in as options in the init()call, or passed in using thetrack()call. If you opt to use HTML tags, your tags should be formatted as Branch hosted deep link data.Has interacted with Journey You can use this filter to target users who have interacted with a specific Journey before by choosing the Journey, the type of interaction, and the window in which it occurred. For example, you could use this filter to display a Journey (Journey A) only to users who had dismissed a different Journey (Journey B) in the past 7 days.
Tips on Filtering
- Using multiple filters creates an “and” condition. Meaning, this Journey will only show if all of the conditions are true.
- You may add additional options for each filter
- ex. Adding different URLs for the exactly matching clause.
- For URL filters, multiple URL entries creates an “or” condition. In other words, the journey will show if a user is visiting either URL A or B.
- If your web page ends with a "?", the question mark character will be treated as an optional expression quantifier for the "viewing a page URL starting with" filter. For example, when you set "yoursite.com/?" for this filter, the Journey will appear on "yoursite.com/?", "yoursite.com/settings" or "yoursite.com/".
- For certain filters (ex. is viewing page url exactly matching...), you can paste multiple values by clicking the Edit All button. This will effectively make that filter meet OR condition.
You can also view examples audience suggestions here.
- Click Save and Continue when you're ready to move on to the next phase.

2. Configure Creatives
In this phase, you will design the creative your audience will see, or add multiple view variations to A/B test the experience across your audience. To do this:
- Add Variation: This feature allows you to run A/B test by designing multiple templates and assigning a percentage (total must equal to 100%) of your audience to each one to compare Journey performance. This will allow for rapid iteration as you track performance data. Click the Add Variation + button to add a new Journey banner/interstitial, and use the percentage fields to control the ratio of your audience that will see each variation.

- Click Select Creative to start designing your banner/interstitial. You will be taken to the Templates page to select a template. Click the Use button on the template you want to work with.
WYSIWYG
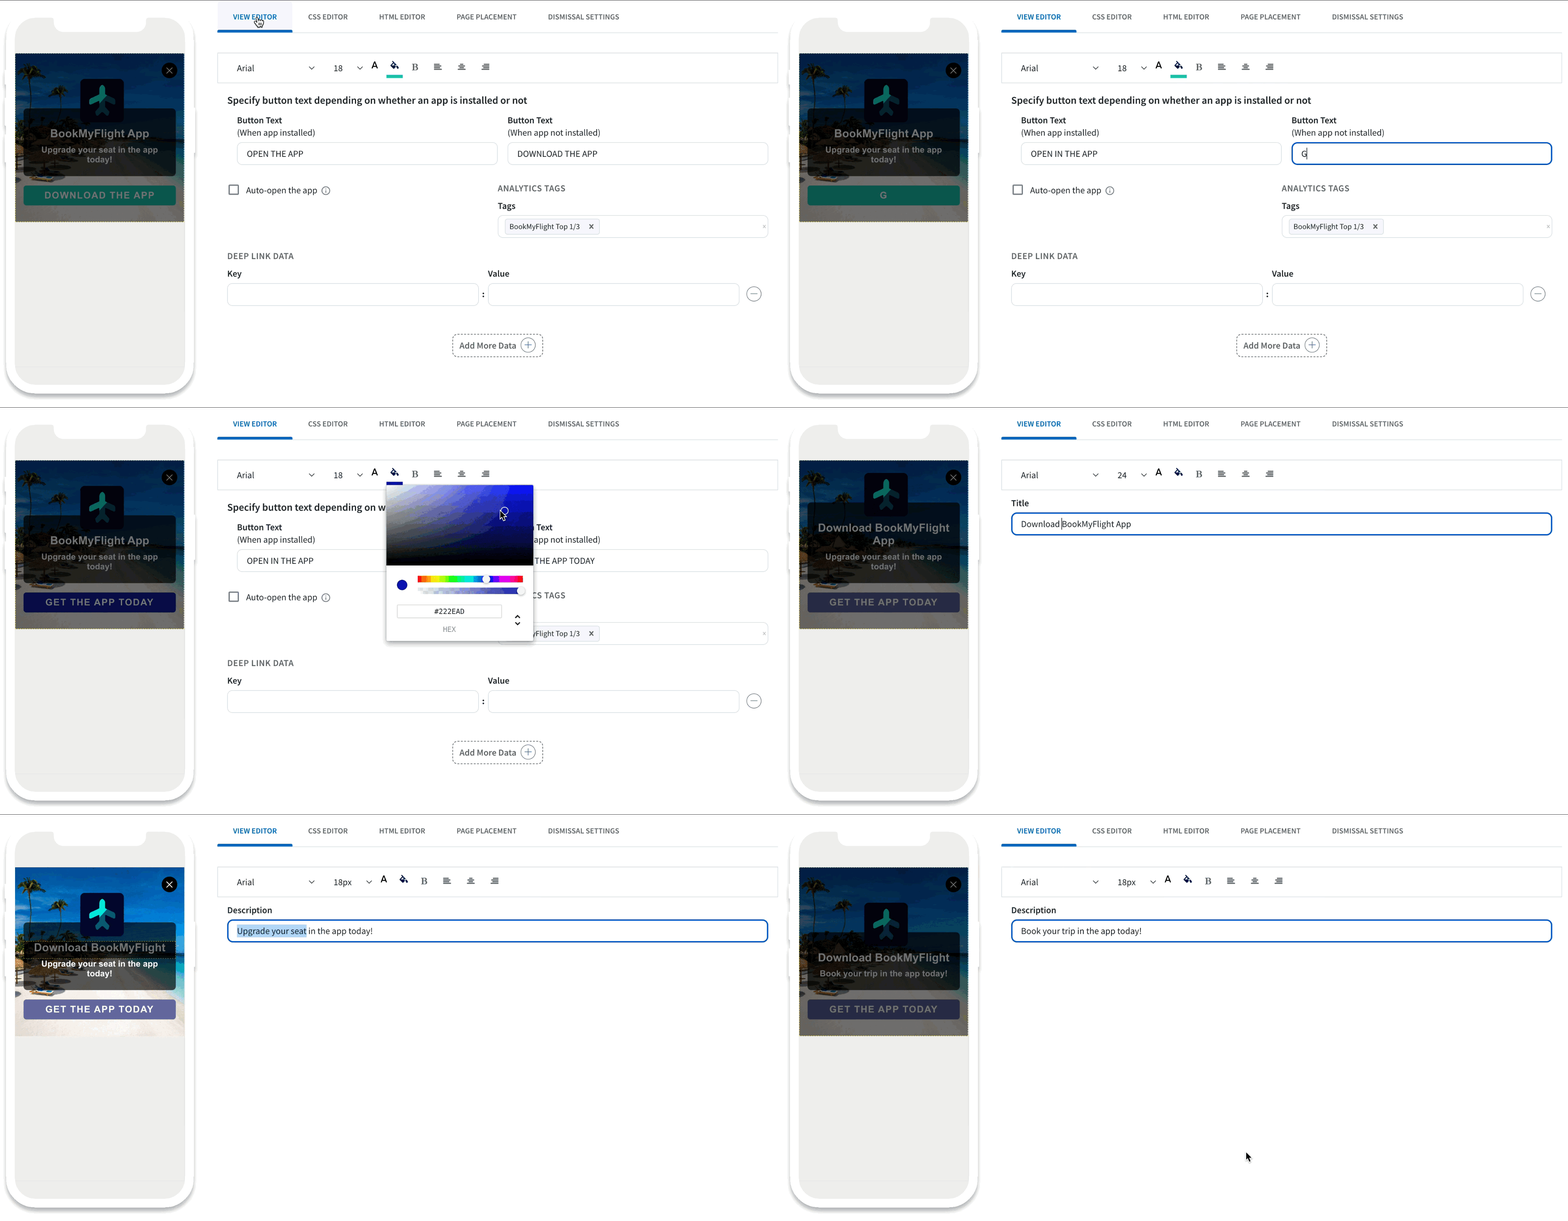
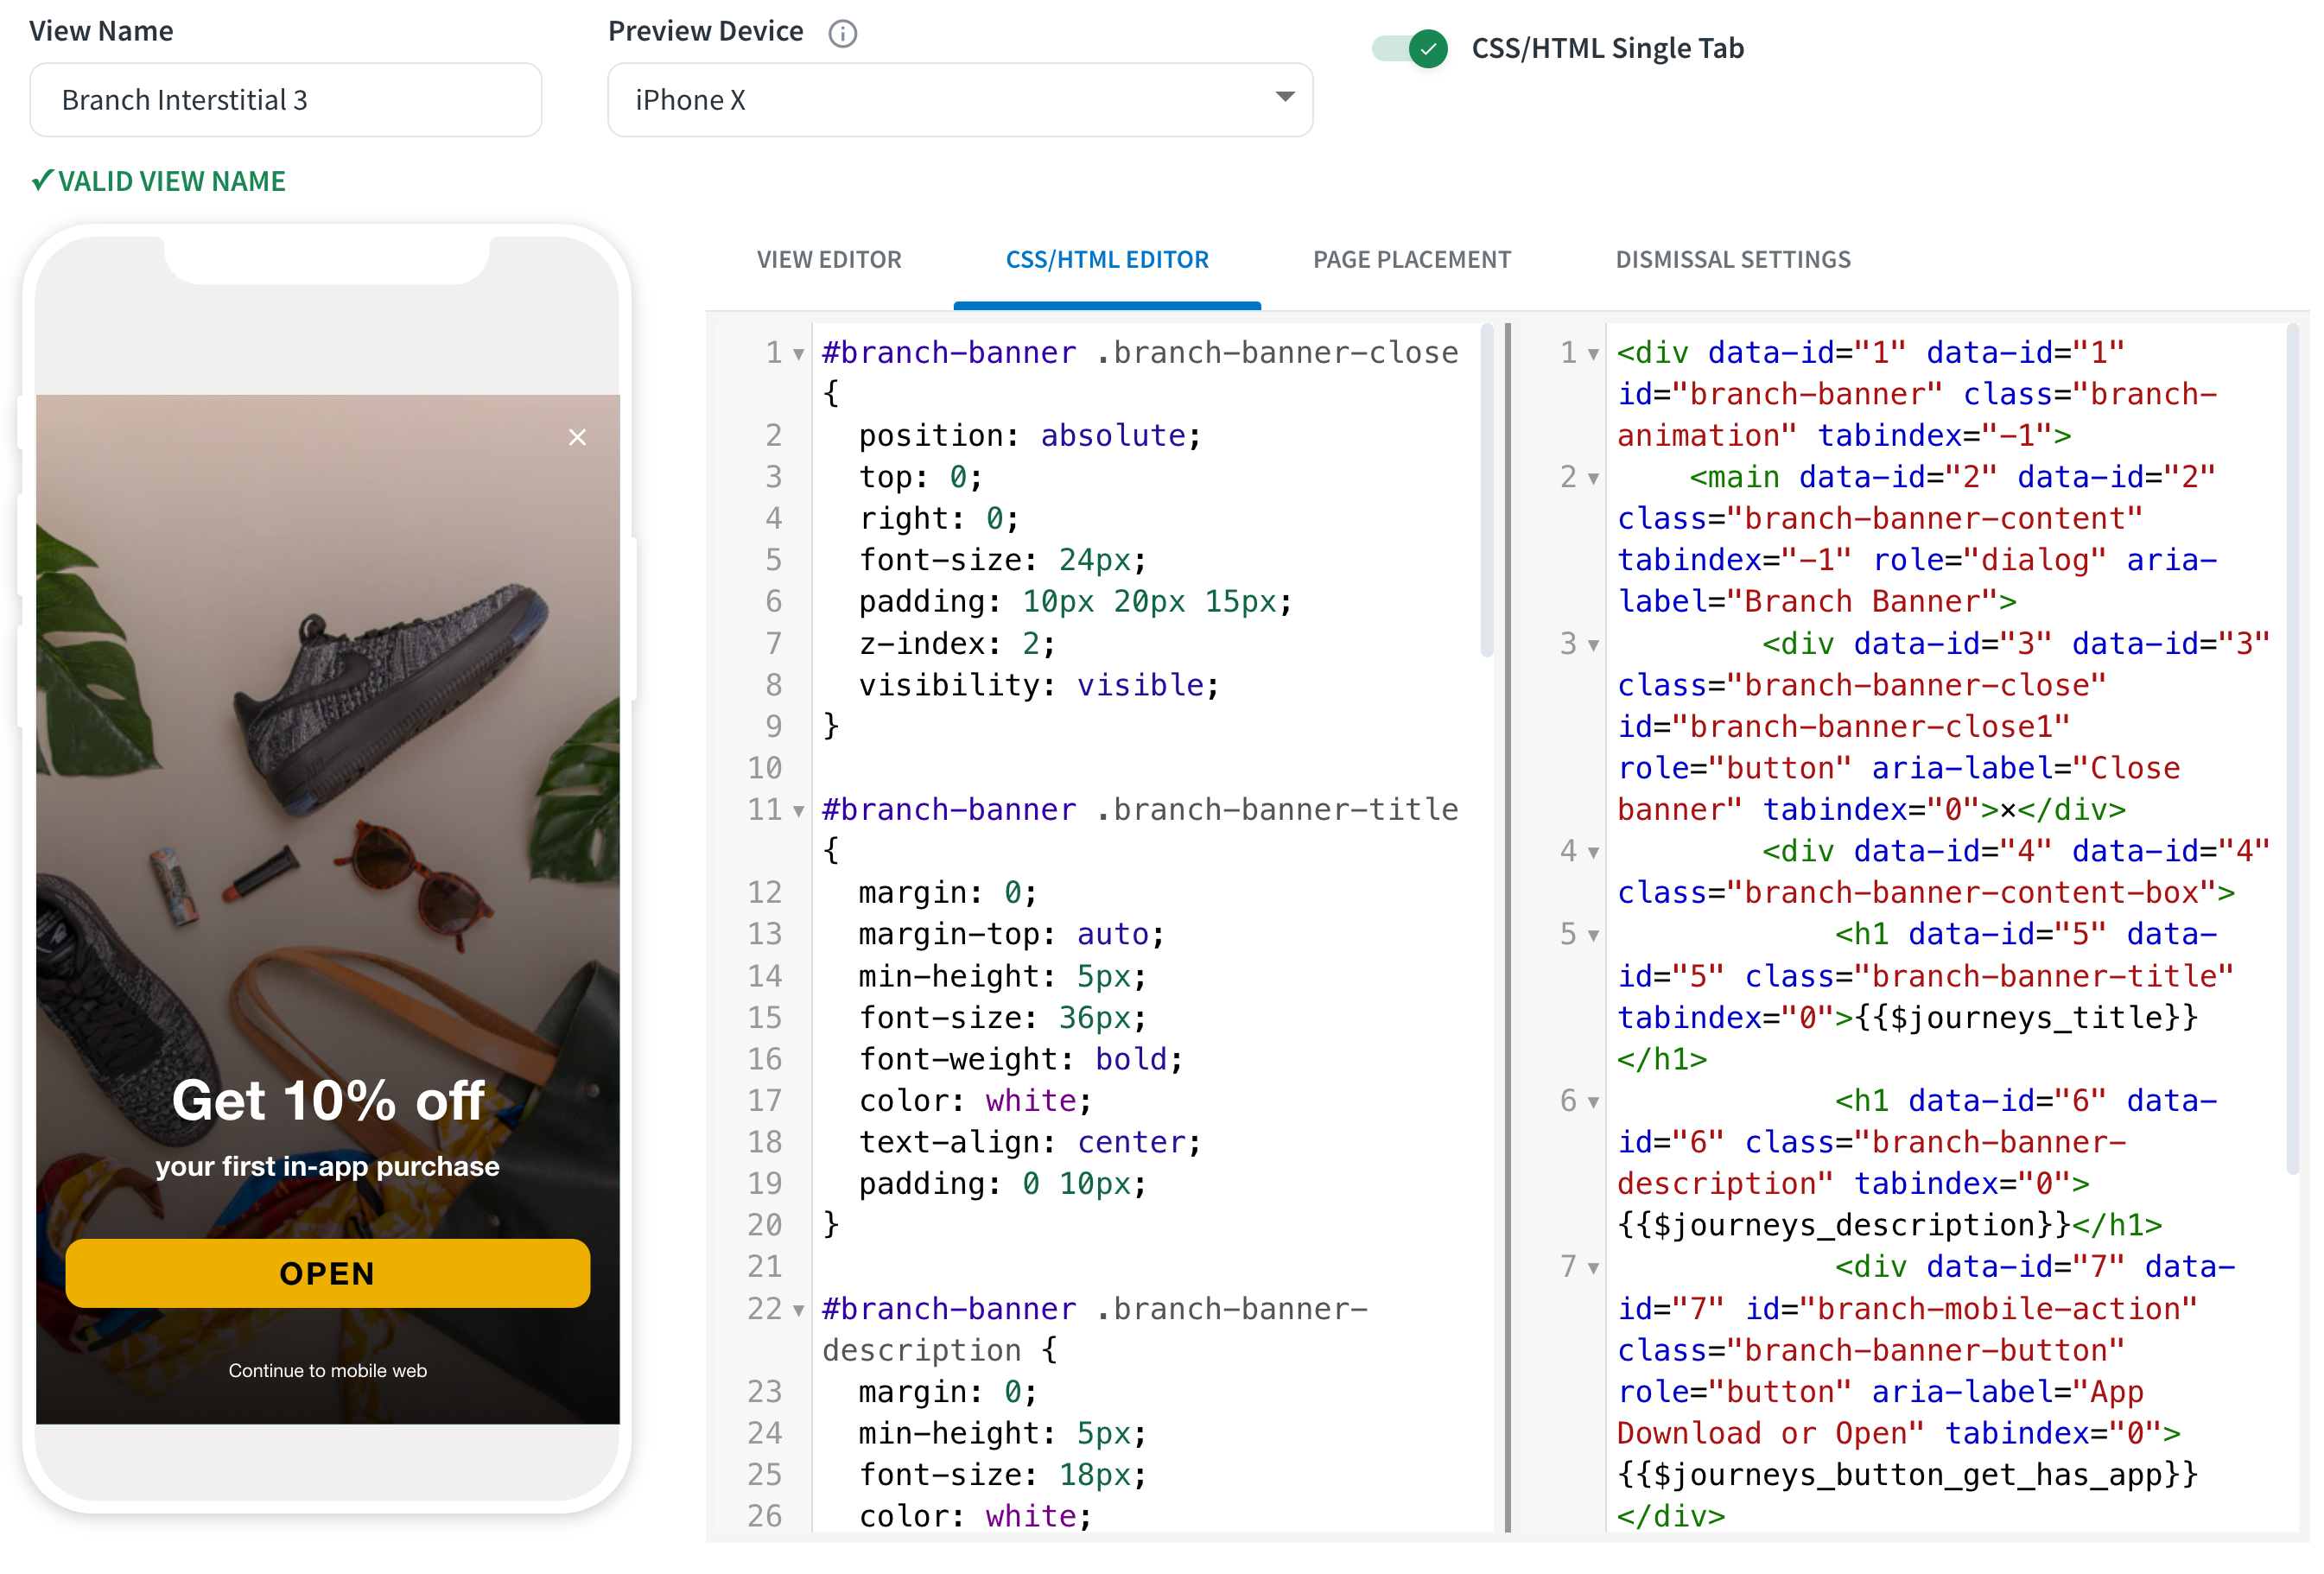
You must first name your creative in the View Name field. Try to stick to a naming convention so that you can easily find it later. Branch uses a What You See Is What You Get (WYSIWYG) editor to make customization easy. In the preview window, you can click the element you would like to customize (Icon, Title, Description, Star Rating, Background Image, etc.).

Advanced UI Editor
For more detailed tweaks, use the CSS Editor, HTML Editor, and Page Placement tabs to customize your creative to match your brand guidelines.
Advanced UI Configuration
We have a detailed guide on advanced UI configuration here.

Dismissal Settings
You can adjust the Journeys behavior when the creative is dismissed on the Dismissal Settings tab.
| Customization | Description |
|---|---|
| Dismissal Behavior | Choose what happens when a user dismisses a Journey. “Close Journey” will simply cause the Journey to close upon being dismissed; “Redirect to a web page” will cause the Journey to close and redirect to the webpage of your choice. |
| Dismissal Period | Use the dropdown to choose how long the Journey should be dismissed for. Next, decide whether dismissing this Journey should cause only this Journey or all Journeys to be dismissed for the chosen period. |
Click Save & Close when you’re done customizing your creative.
You will be brought to the Configure Creatives step. You will see the name of the creative you created. You can create and edit another variation, or click Save and Continue.
3. Validate & Test
In the Validation section, you should have green checkmarks that indicate if everything is set up properly. If you see any errors, go back to that step to complete the configuration. You can access a list of the errors and what they mean under Troubleshooting.
If you have multiple variations, you can preview them by using the dropdown menu.
Previewing
Once everything is validated, you can test the Journey by:
- Input a URL to your website where the Branch Web SDK has been integrated and clicking Get Test Link.
- A unique link will be generated for you to visit in your mobile web browser to preview the Journey. Note that this will ignore any of the targeting you have set since it's forcing the view to trigger on page load.
Scheduling
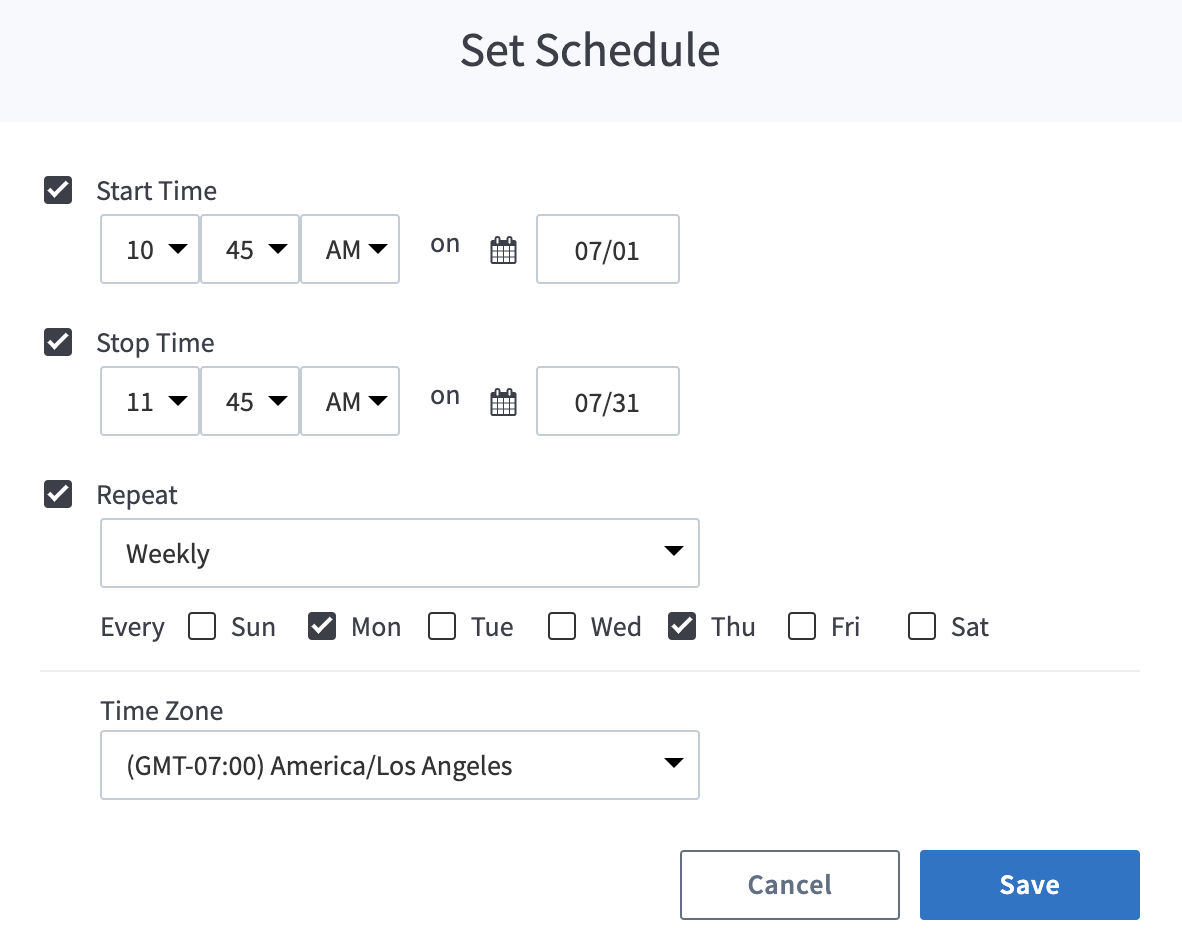
When you’re ready to start running your Journey, click the Schedule button. A Schedule box will appear, where you can configure the following:
- Start/Stop Time and Date
- Repeat Settings (Daily/Weekly)
- Time Zone

If you’re ready to start running your Journey now, click Start Journey. Otherwise, click Save & Close to come back and start it later.
Updated 3 months ago


